Change Honda Generator Spark Plug
How to Change a Honda Generator Spark Plug
Tools for the job
Change Honda generator spark plug. So you’re gonna need a 3/8 inch ratchet. This particular one has a very slim head. That’s the one I like but you certainly can use the normal router. Next tool, 14 millimeter spark plug socket. This is what the manufacturer recommends. I highly recommend getting the metric 14 millimeter size. This is a 3 inch regular extension. This fits into your spark plug socket. Phillips head screwdriver, flat head screwdriver. Gonna need a spark plug gapping set. You can get these at any auto parts store. Even Honda dealers do sell them. You’ll need that to gap your spark plug and then last but not least Honda spark plug.
[WPXperVideo id=15 ]
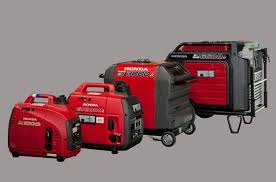
So what are you gonna say. Why do I need the Honda? Watch the rest of this video and I explain it. It makes your life a little bit easier and you are guaranteed to get the right plug if you buy it from your dealer and all together that’s what you need is a pretty easy job. Watch the rest of the video when I’ll show you how I do it. Alright youtubers so one of my loyal viewers asked me if I could show you how to replace the spark plug on an EU 7000. So there aren’t a lot of videos on this because this generator is still pretty new.
When to replace the plug
But if you read the book you’re actually supposed to replace the spark plug, I think that the manual actually says whenever it needs it. But in my case I like to do the plugs every year and I might be a little bit old-school but I would recommend that you want to at least do it every two years. I’ve had a couple plugs over the years go bad and on something like a generator it’s well worth the 3 bucks to replace it before it ends up being a problem. So if your generator is brand new you don’t need to do it. But I think it’s important to know how to because you might need to do it at some point.
flat-head screwdriver I’m on the left hand side of the generator this is the left door and that’s if you’re facing the control panel it doesn’t really matter though you only have two doors so keep opening them until you see a spark plug so we’re gonna open this door and for purposes this video you don’t need to do this yourself Honda’s pretty clever this door has a tendency to want to close a little bit so if you actually lift this off it’ll actually come out and finagling it pops off so we’re gonna put this aside where it doesn’t get damaged or scratched.
The spark plug cover
In a previous video I showed you how to do the air cleaner but in this one we’re gonna learn all about the spark plug today let’s start with a Phillips head screwdriver easy enough and first let’s explain where the spark plug is so this is the spark plug cover right in this area and it’s identified with a very easy to see Phillips head screw so we’re gonna unscrew that just a few turns and this is what they call a captive screw so what happens is this screw never actually will fall out it holds the screw which is why they call it captive.
Now once it’s very loose don’t worry that it’s not gonna pop out you’re just gonna gently lift the cover off and so now at this point what we’re gonna do we need some close-up so you can really see how this works. So the spark plug boot as they call it is actually right here so when you’re at home don’t be so nervous because this area is pretty well lit because I’ve got some creative lighting going on but at home you might not be able to see it quite so well. I actually recommend doing it outside if you can.
14mm spark plug socket
Now all you need to do no tools I just have my hand with of course my gloves on and this little boot tab right here. It might not be the exact name for it but all you need to do is pull that off. So the easiest way is to just use your hands and grip it with your thumb and your forefinger and just pull that out and that’s it. So right now you can see that we’ve got the boot off and underneath in here for my fingers pointing hopefully you can see the top of the spark plug that’s right here.
Now what we’re gonna do. I like to tuck this out of the way a little bit here. Now what we need to do now we need a spark plug tool that’s gonna go in there and I’m gonna show you how that works. Bit of a tight clearance. You’ve got your spark plug in here and you’ve got a frame right here. So my recommendation is you’re gonna need a spark plug socket and in this case because this is a foreign machine or a Japanese machine it’s metric. But you can use other sizes but the official size is a 14 millimeter spark plug socket. This may not look exactly like yours does but 14 millimeter is the size you want.
Need an extension
So the next thing you’ve got to get because this by itself is going to be so far in you won’t be able to do it. You need an extension. I recommend a particular extension of this size. The reason is this is a three inch extension. So if you use a longer extension than these two so I’m gonna put these together. Therefore you’re looking for about six inches of length on this and the reason you need this is the next step you’ve got to do is insert this tool onto the spark plug and make sure it’s seated properly. But the real challenge is as you can see it’s a little bit tight in here.
if you get an extension that comes way out the problem is the angle. It’s gonna hit this frame and you’re actually going to damage your spark plug. So my recommendation is you want the extension inside the frame so the frame is actually here. The extension is in. See if I can zoom a little more hard to get from that angle but you’ll see it when I put the ratchet on it. So in my case I’m using a little bit of an old-school ratchet. This is just a regular ratchet even though it looks a little bit unusual.
Loosen spark plug
I like it for tight situations. So at this point now again I’m gonna push the boot out of the way a little bit. I’m gonna put this spark plug two lon so again the key is you don’t want any pressure on this ratchet. I can still put my finger up in the frame in the still room sometime. Zoom in in this a couple of different ways so that you can really get the angle of what’s going on here. So again I’ve got the ratchet on top of the spark plug boot and I can’t stress this enough. Because if you are putting pressure on that spark plug as you pull it out you absolutely can damage it.
Now the key is if your ratchet is a little bit Wiggly afterwards that’s okay as provided that you’re using the 14 millimeter socket has to be tight on there but you just need clearance for the ratchet. So I’m sorry if I’ve over explained that. But it’s really important. The next thing you’re gonna do is you’re gonna loosen your spark plug. Okay that’s out so in my recommendation I don’t use my ratchet to loosen the spark plug once it’s loose. I pull that right off and then I’m gonna actually twist this by hand and the reason again I do that is because if I’m doing it by hand I’m not going to damage this.
Unscrew plug
So I’m gonna slowly do this and I’m gonna unscrew it and you keep going until it really is quite loose and again if you using a spark plug socket once you’re done and you take the plug out it should come out and the plug should be on the NDA sockets. Let me zoom back out a little bit now and it actually looks pretty good. That’s your spark plug hole right there. So now that we’ve got a spark plug out we’re gonna get a replacement. We’re gonna take a look at it all right. So now we want to get our new spark plug ready and get it installed and it’s actually pretty easy. I’ll show you the steps.
So the first thing to talk about is the ends of these spark plugs. Now when you look at the ends you see these threads. In the old days used to spend a lot of time and effort putting anti-seize compound on these and I know that a lot of guys still do. By today’s standards in per NGK who is the manufacturer of the spark plug honda recommends you do not put anything on these threads. So you take the spark plug right out of the box and it is ready to go except for one thing all right.
Use feeler guage
So now we’ve got to gap this plug so let’s take our feeler gauge and we’re going to put it into the gap and we’re going to run it in. Now there should be a little bit of resistance here and that’s what you’re looking for. Just a small amount of resistance. It shouldn’t be very loose. It shouldn’t be so tight that you can’t get it in. My recommendation is if this is not the case I don’t recommend bending these in your own unless you’re pretty experienced. So my recommendation again. I said it earlier. Buy this plug at a Honda dealer ask for the Honda branded plug.
It won’t actually have the Honda name on the plug. It’ll still say MGK but it’ll come in a Honda box so when you look at it this is going to be the end of it it’s gonna say BP r6 is so this is the correct plug per the manufacturer’s instructions for the EU 7000 is. So again if you’ve learned one thing from this part make your life easy pay two dollars extra and go to the Honda dealer or order it online. Get the Honda part number of the plug and you’ll get the plug ready to go. Typically it’s gapped. But I’m still telling you it’s worth double-checking it with that feeler gauge to make certain.
Retighten the plug
Or if you having a problem ask your dealer to check the gap and they typically will for you. You can still do the job yourself and save a lot of money. Alright so once your plug is gapped, and again you don’t need anything on the end of it, all we need to do is take our sparkplug tool reattach the plug in it and now our goal is to get the spark plug in that hole. So very gently you are going to put that tool right back in and I like to wiggle a little bit and once you feel that that spark plug is there you can very gently. I absolutely recommend you turn that tool by hand.
You’re gonna spin it until the spark plug finally tightens up and again I do not recommend using the ratchet until the spark plug finally reaches the bottom like it did right there. So I can’t turn it any more by hand and if you want to check it to be sure you can even loosen it just make sure it feels like it’s threading in smoothly. Now I’m gonna retighten it back up to where it was and now all we need is to use our ratchet.
Replace connector
So take our ratchet. Put it on there and I have to reverse the direction and this is again just a average ratchet and when you tighten it this is where things have a little need to be tight but not so firm that they’re gonna tear the end of it off. So I just recommend putting it on fairly tight. Typically they recommend that after that spark plug touches the bottom that the ratchet moves a quarter of a turn. What a quarter of a turn means it goes from here a quarter of the way across. Consider a full circle so you go into fourth of the way and it can vary by manufacturer
So now that that’s done and it’s tightened up we’re gonna remove our ratchet and our spark plug tool. Now that our spark plug is installed and it’s tight we need to put this boot back on. it’s very easy. You just slide it on to the spark plug and you press it until it goes in all the way and a lot of times you’ll feel a little bit of a click from the connector. So I’m going to slide it on.
Replace cover
I don’t know if you could hear that but when I push this boot all the way in it made a little click. So now we’ve got the plug back in it’s tight. All we’ve got to do is, zoom out a little, is to put this cover back on. So this just very easily snaps on. Now that that covers on we’re just going to tighten it up. We’ll screw this in until it’s tight. So what this cover it doesn’t stay 100%. Like it’s pretty tight but if you pull in the edge you’ll see there’s a little bit of play. And that’s totally normal.
Now the good news is at this point we’re done. So we’re gonna turn our key to on. You’re gonna see some control lights light up and then once they go out you ready to go. Push the engine start. Make sure your eco throttle is on the off position that means the generators going to fire a full speed. Everything good. This concludes the spark plug change